No one is born a professional, it takes practice, years and lots of learning to be good at what you are doing. Same goes with the photography. No one starts with being the best in it, right? Well, for the initial stage, all you need motivation and wellness to learn and to move forward with it.
Do you see the difference here? It might just appear to you the change in angle but for the photographer, it must have taken a lot. This is what years of practise brings.
If you are new to this or are struggling with getting better pictures for your food photography, say no more. We are here with the most important tips to help you improve your food photography in a serious way:
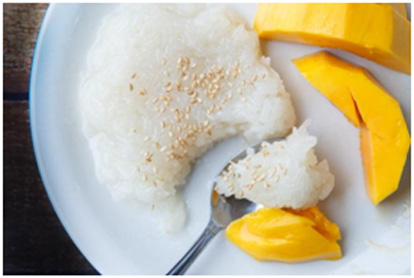
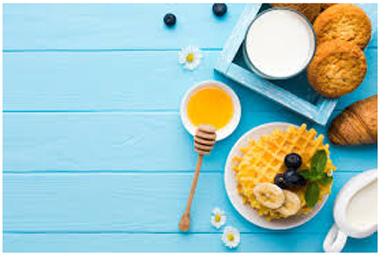
- Natural lights- Having expensive cameras with great flashlights are absolutely useless. The element that natural light can add to your photography is nothing compared to any form of light. Each and every small aspect can affect your photography, even the colors of the wall of the room you are clicking can influence your pictures. Shocking, isn’t it?
Can you see the way in which the natural colour of the food is coming out in this picture? If your lighting is right, your photograph will improve instantly.
- Use a tripod- Many photographers might find using a tripod stand quite a time consuming and annoying too sometimes. Because for instance, if you have to take a picture from a slightly different angle, you will have to change the entire setting of the tripod. Sounds annoying to you, too right? But trust us, those 60-70 seconds that you will waste in changing the setting of your tripod will make a tremendous change and that will not be a waste of time anymore. A tripod can give the perfect angle to your prop and to your object.
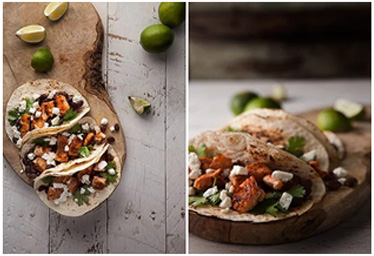
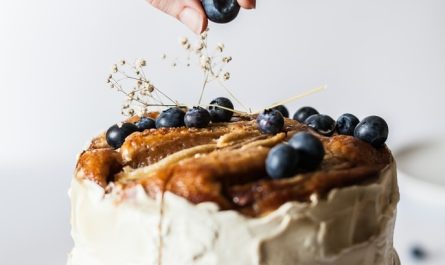
- Shadows and Messiness- A newcomer or a basic photographer would want his object to be perfect, with no messiness, nothing lying around the food. But a brilliant photographer will embrace all these things as these things add elements to the picture. Do you know what the first reaction that a food photographer wants from his audience? That is immediate drooling, wanting to have that food right away.
Can you see the beautiful mess around the food?
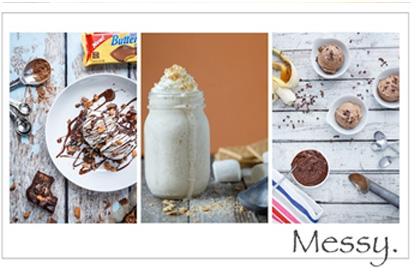
Does that annoy you? Does that make you want this right away? Yes. Well, guess you got your answer.
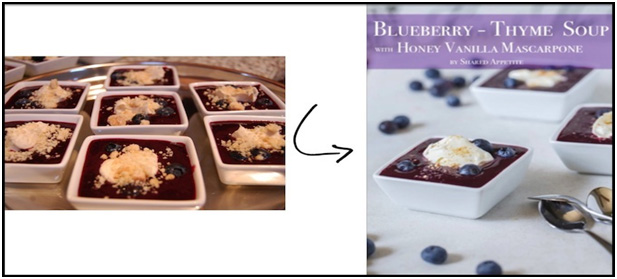
- Use lightroom app- If you use an iPhone, you should definitely use this app. Many photographers just edit their pictures with the iPhone app, but here is exactly where they go wrong. The app is incredibly friendly to use and comes with its own mini manual. It’s an app that comes with loaded features in the apple computers.
Here, you can actually see the difference between the two images, can’t you? The image on the right is after editing through the lightroom app. Looks like it changed the image upside down, right?
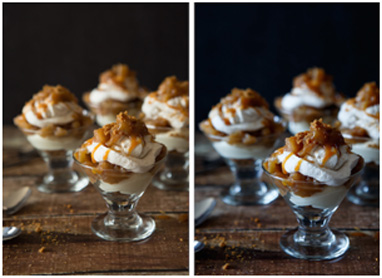
- Some quality props- You need to be super choosy and selective when it comes to adding props in your photography. Adding some is good but adding a truck load of them is definitely not. Try to find props that provide good contrast and different textures to the object and to the photo. For instance, say small plates and some cutlery, they make a good pair and when it comes to contrast, they work for the best.
You can vividly see how the props enhanced the ultimate look of the image, can’t you?
- Set up your shot before- A successful shoot is all about planning. You must plan and prepare your frame prior to your shoot unless you are shooting something that can melt or can look nasty like a cupcake. Just set up the camera before shooting, set your tripod stand where you find the most appropriate light and get your props ready. Focus on making the scene look more natural and less forced. You might use different props and backdrops for different food items like while shooting or drinks, you can use paper towels with the glasses.
- Level the photography- This is generally for those who work for big chefs. Some of the time, the main and hardest part about getting a good photograph is not the light or the props but the food itself. And this is the reason why you need to level your food according to its need. Like if you are shooting from overhead, then layers of ingredients should be faced straight down the plate.
Can you see the angle and the difference in the layers of both the photography? This is exactly what it takes to shoot from different angles. Setting up the layers.
- Have a bag full of tricks- If you like clicking your pictures in different places, you must have a bag where you can find all of your essentials and every other thing you need. For instance, say- chopsticks, they are easy to carry and good for moving with too. Also, it goes with every dish so you get a prop with you too.
- Practice as much as you can- Of course practice is something that will make you a professional and will lead you through. You know what can really help you? Looking and learning from the photographers you admire, looking at their work makes you perform like that and hence you practice for it. So, try to replicate that photography you like gawking and staring at. Because the greatest form and way of flattering onto something is imitating it.
- Right equipment and tools- Having the newest and latest technology camera isn’t going to make your photography great but the right equipment at the right time and the right position surely do. It is all about patience and the amount of practice.
Can you see the way the object is put at the angle of light and the way the camera is put? This is what all it takes to get stunning photography.
For now, these are the essentials that you need to get great food photography. But don’t forget that practice is something that you need the most.