120 Food Photography tips and tricks from photographers in 2023
The smell of a freshly-cooked meal is something most people will never forget. But if you're doing food photography, then that too can be a challenging task. Luckily for all aspiring food photographers out there we've collected 120 photography tips from experienced food photographers.
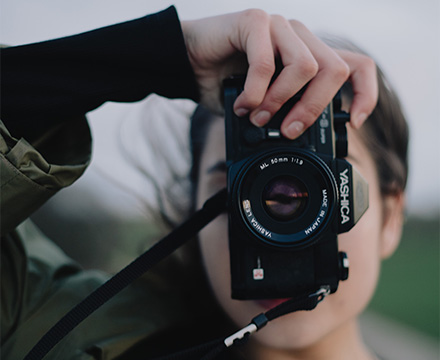
No matter what type of camera you are using, food makes a great still life subject, whether you are using a smartphone or a professional model. You can surely produce some artistic results with such a simple, yet intriguing subject and a bit of good lighting and composition. The art of celebrated food photography isn't all about taking a picture of your dinner plate and posting on social media. It is lot more than this. Like other forms of photography, food photography has specific rules you have to follow to make sure you capture stunning images that have brilliant colors, textures and shapes. So if, you are looking to improve your food photography skills, then do real this amazing article.
And if you need some more assistance in photographing your dishes do give us a call or drop us an email message with photo requirements and specifications – our team would be happy to help!
Here is a list of tips and tricks from the photographers:
If using a professional DSLR camera, then using the RAW format in camera settings, provides the flexibility to edit the photographs in much more detail later.
2. USE A TRIPODUsing a tripod or any stand stability changes the outcome drastically. This avoids camera shake and a more stable camera shifts allows the shots to be taken in greater detail, without worrying about blurry images.
3. INCORPORATING MOTIONS OR MOVEMENTSThis is one of the best ways to bring life into any kind of food shoot. Including movement of water, cream or the smallest little motion in the photograph gives dept to the picture and makes for taking great shots.
4. DIFFERENT HEIGHTSExperimenting with heights for different subjects works very well.
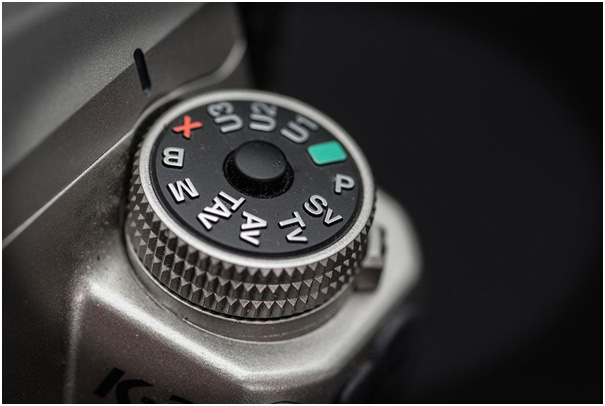
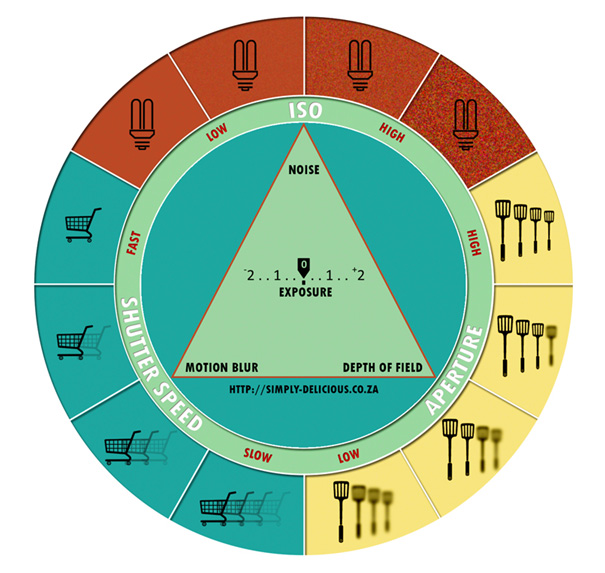
Using the manual mode of the camera opens up a lot of control and allows you to change the settings like shutter speed, aperture, ISO, etc. This can be of great use in creative food photography and allows you to experiment a lot.
6. CHOICE OF LENSThe kind of lens used is very essential in photography, as it determines the scale of photographs as well the bokeh that will be incorporated.
7. WORK WITH THE APERTURETo shoot a table-scape use a higher aperture to make sure everything is in focus. You can also use natural light to ensure this if there is a paucity of artificial light.
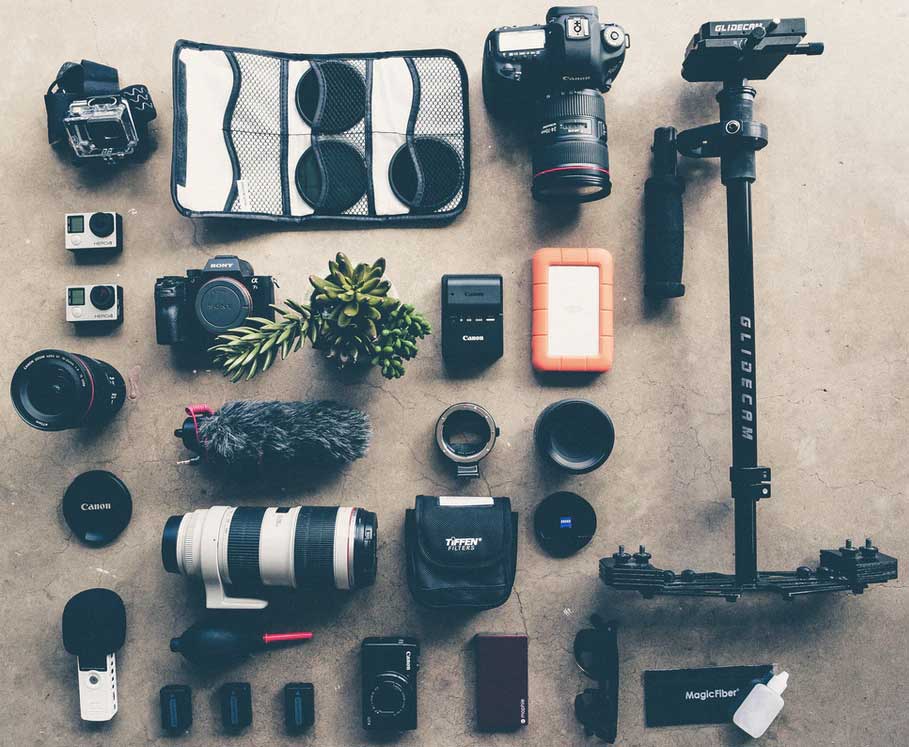
8. STORAGE IDEASFrequent change or formatting of SD cards and carrying extra cards and hard disks is a ground rule for a photographer to never run out of an opportunity to capture.
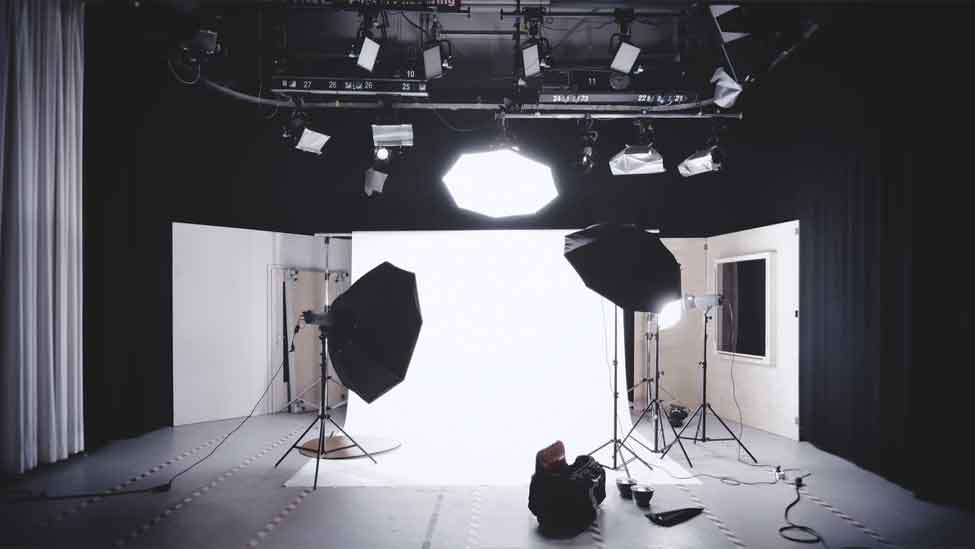
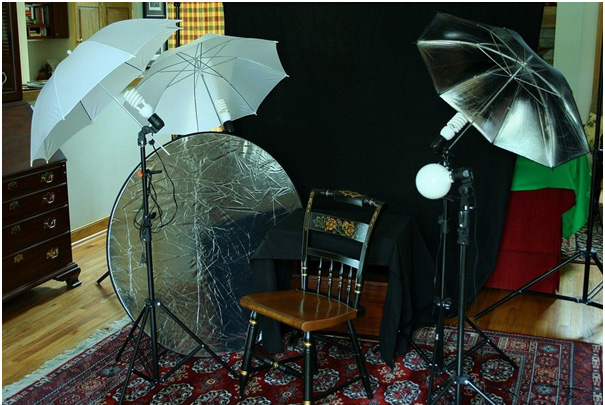
For a quick restaurant photo session, a camera, a reflector, a light, and a tripod may suffice. However, for a large commercial food shoot, multiple camera bodies, multiple lenses, lights, and tripods are required.
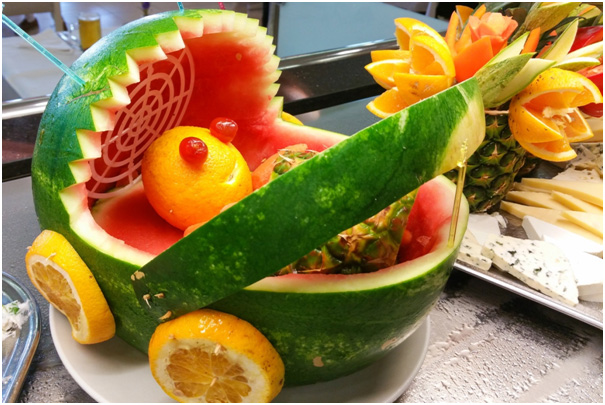
10. PROPSBuying or renting props for photography or backdrops bring a new effect to the pictures and bring out the colors in the dish. The props have to enhance the food elements that you want to showcase.
11. USE OF MOBILE PHONEIf shooting for non-commercial/person blog/feed work, the mobile is sufficient. Using the right applications for post-session touch up is essential though.
Even though not every photographer recommends using a wide-angle lens, experimenting may lead to unexpected but desirable results. Wide-angle lens can also ensure that you do not miss any complementary elements in the photograph.
13. BATTERY BACKUPKeeping battery backup is another ground rule. This rule is essential whether you are a professional photographer or maybe just taking photos of food as a food blogger.
14. NEGATIVE SPACEGiving the subject some room and using the negative space is a very good idea in all kinds of photography. Negative space is basically the space that is surrounding the main product in the food shot. It is used to give breathing space and make the food images look uncluttered in professional food photos.
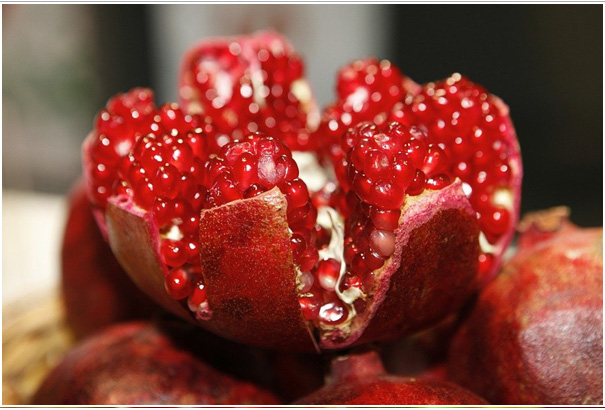
The fresher the food, the more vibrant, better the results will be.
16. EXPERIMENTATION WITH THE SETUPThis basically means that you have to experiment with the lighting conditions, use variations like overhead shots, maybe experiment with the food selection (using colorful food items), and so on. Doing so will enhance the effect in the picture.
17. SHALLOW DEPTH OF FIELDShooting with shallow depth of field will give a soft blur to the background and give the subject some clarity. Depth of Field is mainly used as a technique to draw the viewer's attention to a particular part of the photograph, by obscuring the other details. The amount of light that you have can also affect the Depth of Field to a large extent.
If anything does not fit or tie the picture together, it must be ditched. If that is not possible using the above tip of using the depth of field to hide the clutter can also work well.
19. USING NATURAL LIGHTThe overuse or rather use of too much flash or artificial light must be avoided. This depends a lot on the location and the local lighting conditions too. You can use artificial lighting when needed, but just avoid overusing it.
20. CLEAN BACKGROUNDSThe background must be kept plain and uncluttered. Using complex designs or textures in the backgrounds has to be avoided. Many times using a neutral background can be of great help.
Having a fifteen-degree shooting angle works very well. The full arrangement of the food done on the plate becomes visible with a little perspective angle of it. This is ‘the angle’ in which most of the food photographs are clicked and is the best to click pictures of cold drinks, any kind of coffee or just any kind of drink.
22. THE ANGLE (25-30 DEGREE)This angle is used to show the horizon of the background of the food giving the observer a little bit of a story. If the food is served on an open plate, it is the best angle as it clearly exhibits the food and its thickness. This is a very important aspect of food photography.
23. THE ANGLE (45 DEGREE TILT FORWARD)This angle is close to food served to you on the serving table just waiting for you to eat. This angle is best when it is a shoot for soups or one-pot-made meals.
24. THE ANGLE (STRAIGHT ON)Or the horizontal shot. This is the angle in which the food items like sandwiches and burgers are shot. This is similar to a 0-degree angle shot.
25. THE ANGLE (90 DEGREE)This is the angle that makes it easier to make a composition as the depth of field can be eliminated. Proper light is of the essence in such shots and avoiding shadows can be a task.
This is the type of food that is only important because it has no history. This is a very tight shot and the object of the photograph almost fills the screen totally. In a softbox setup where the backdrop is fully white and it makes the food look like it's cropped, they are often clicked.
The camera is tilted slightly to the left in this shape, so the image appears to be tilted clockwise. This perspective makes the food look like it's pulling away from you, giving the audience the urge to pursue the food.
28. PERSPECTIVE SHOTThe camera is centered above the front of the subject, then once the subject fills the frame, the camera is tilted up.
29. DIAGONAL SHOTYou can take a photo here in such a way that the subject begins from one corner of the frame and ends at another corner that diagonally spreads the food in the frame.
30. CLEANLINESS WHILE TAKING PICTURES OF FOODDouble-checking the plates for smudges and table clothes for creases. They are easy to fix and create a lot of difference.
If doing a commercial assignment, it's important to communicate and understand the brief. Fulfilling the brief is as important as getting a great shot.

Creating a mood board before starting can help. Choosing the perfect colors in sync with the dish is very, very important. Choosing the right abstract containers and crockery plays a very important role in the game of presentation.
33. PLAYING WITH SHADOWSSoft shadows generated by efficiently diffused natural light instead of artificial light, can give your image depth and generate a lot of visual interest.
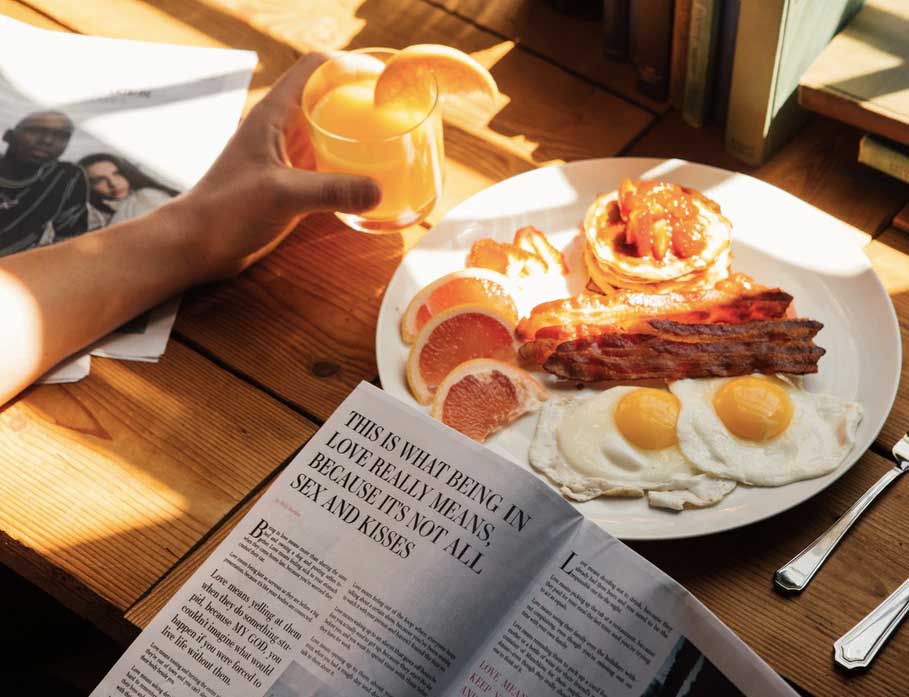
34. INCORPORATING LIFEHands or any sense of life, makes food photos feel more realistic. If you want to avoid having a food photo look too artificial, involve some hands or movements.
35. PRACTICE WITH THE FOOD PHOTOGRAPHY METHODSPracticing the shot before and practicing, in general, is very, very essential. Many food photographers spend a lot of time trying various food photography methods to get the best result. And as the common saying goes, practice makes the man perfect.

Lighting is one of the mainstays of creating beautiful food photography and having the right quality of light can mean the difference between great photographs and just average ones. This is also the reason that when we depend upon artificial lights, choosing them wisely is a must.

Depending on the kind of food or any other product being photographed, you can choose between continuous lighting or flash. Sometimes flash may have to be avoided as this kind of lighting may create hard shadows and at other times continuous lighting may just not be strong enough.
The color of the food would strongly impact the background color or texture. Having a complementing color that also contrasts well with the food can go a long way in the aesthetics of the food photograph. Depending on the food color and the kind of presentation you wish to accomplish, you can use light backgrounds, neutral background, or dark backgrounds

Shooting the food from the point of view of the editing photos and post processing, that you may want to do later on is also of the essence. This is vital as you can plan the shooting technique, settings, and the elements of the photograph beforehand and ensure that you get the desired result.

Sometimes the best way of getting the colors to come out well could be simply by removing the curtains and allowing the natural window light to come in. Natural lighting also adds to the food styling and makes the food look more classic.
While on the topic of lights, one thing that can serve you well is using a light cutter and reflectors to cut and reflect the sunlight, especially when you are shooting in an outdoor area.

Getting the right kind of settings for the table can also make the photography look much more appetizing.

Like any other photography, getting the right balanced composition can make your work stand out. Following simple techniques like the rule of thirds can go a long way in helping you get the right kind of photograph.

If you are in the photography field, then knowledge of software like Adobe Photoshop and Lightroom can give you much better control over rectifying your work or even enhancing it later. This also increases the various artistic possibilities of creating varied outputs.

Doesn't that ice cream look appetizing? Well, this may have got a lot to do with the shutter speed than the ingredients. Shutter speed is often a forgotten element in food photography. Faster Shutter speed? Or maybe a slower shutter speed? So many possibilities can be confusing. For a Handheld camera, the rule is that your shutter speed should be twice the length of your lens. So if you are using a 50mm lens, your minimum shutter speed should be 1/100th of a second. If you are using a 100mm lens, your minimum shutter speed should be 1/200th of a second.
46. FOOD STYLISTGetting food styling done can really add value to your photography efforts. So if you can afford one, be sure to do so. This is specially helpful when you have to draw attention to a specific point in the composition and show all the details.
47. INSPIRATIONBefore starting your food photography process, be sure to refer to cookbooks, food magazines, food blogs, and other similar material to get a better idea to ensure that your work rocks. If you really want to understand the creative process behind food photography, we highly recommend the YouTube video by Lauren Short. Creative Process for Food Photography with Lauren Short.
48. RECIPESWhile shooting images of food, ensure that you choose the most visually appealing recipes that use ingredients with a lot of colors.
49. CONSISTENT PORTFOLIOHaving consistent work quality is the best way in which you can ensure that work keeps on flowing to you.
50. USE DUMMY FOODThis allows you to set up your composition, lighting and all the other setting perfectly while your main food elements keep their cool in the refrigerator. Bring them our only when you are ready to start. I am sure this was one of the unusual food photography tips for you.
51. OTHER ANGLESUsing the right angle can mean everything in food photography. While we have spoken about some angles, please do not stop experimenting with other angles. While some kinds of food will look great from a top angle, others can look absolutely disgusting. Hence experimenting with angles and using the right angle is of the essence in bringing out the beauty of the food.

Using the right kind of background and surface is the key in bringing out the various facets of the food. Using a high contrast theme of using textured background can be of great help in showcasing your food.
53. ISO SETTINGSAs a food photographer aperture and ISO settings are your best friends. High ISO settings can help in bringing out the contrasts in the best way possible. Experimenting with these settings can give you unexpected returns.
54. ARTIFICIAL LIGHTLike we have said that using natural illumination can give you good results, but many times using artificial light and that too colored lights can really help you in differentiating the background and the foreground.

Using a high-quality SD card it is always advisable to transfer the data on your hard disk before you preview the photos using a card reader. Many times SD cards become corrupt during a preview by the card reader.
56. WHAT YOU PAY IS WHAT YOU GETDecide the scope of equipment according to the budget. For a basic assignment with a low budget, a single camera, a basic lens kit, and reflectors would do. But if you get a good-paying gig it is always better to go for the best equipment available, multiple cameras, and illumination options. The output will speak for itself and can lead to a lot of business your way.
57. USE ACTIONMany photographers swear by this mantra. Using the candid style of photography, they ask the chef to prepare the food without thinking about the camera and they photograph action scenes while the chef works. Such scenes could include the chef swirling the food, chopping vegetables, and so on. The same trick is used quite a lot in commercial photography too.
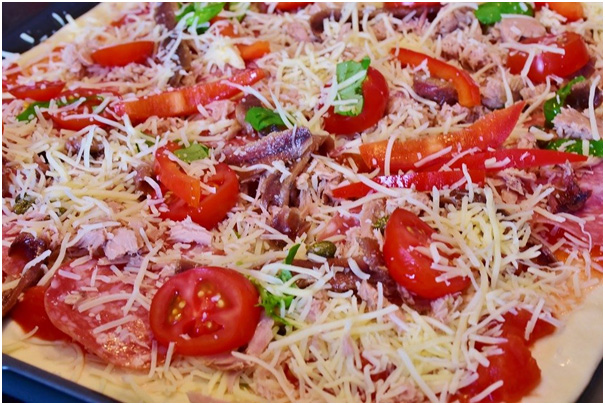
58. FOOD PHOTOGRAPHY ADDITIVESNot all that you see in commercial food photography, in fact, some of the things used to make your food look appetizing can be inedible. For example, the great-looking cheese on the pizza can be glue and the shiny-looking hamburger can actually have a coat of motor oil.
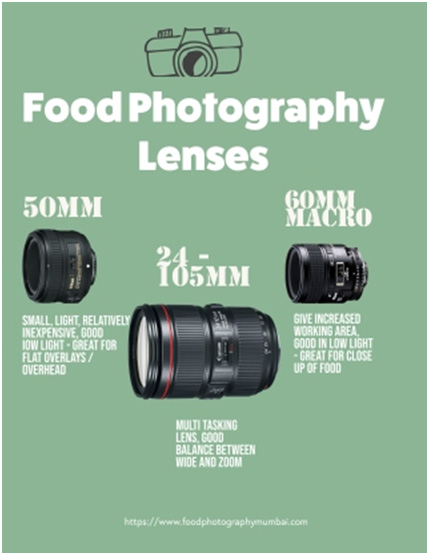
59. FOOD PHOTOGRAPHY LENSESSome of the best lenses for food photography are block fixed-focus lenses. In this category 28mm, 35mm, 50mm, and 60 mm lenses with an f/2.8 aperture are preferred by a lot of photographers.
Choosing the best cutlery for your food photo props is a great way of ensuring the food looks aesthetically great. Using colorful cutlery can ensure that your food looks even more appealing.
61. USE PANORAMIC PHOTOGRAPHYUsing panorama mode to capture a buffet setting goes a long way in showcasing the variety of food in a single click. This is another popular food photography method used by experts to showcase their photography skills.
62. SILHOUETTESUsing lowlights and just showcasing the silhouettes of the food also adds a sense of mystery to your photographs. This technique is specifically used along with mood lighting to create an exclusive look.
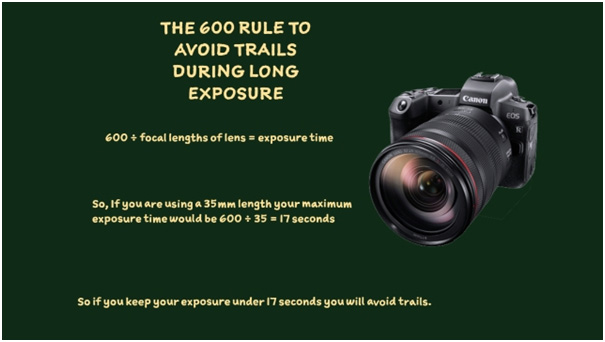
63. USING THE 600 RULE TO AVOID TRAILS DURING LONG EXPOSUREMany times during a shoot you may be tempted to use long exposures (maybe due to lack of illumination), but this can also lead to trails in your photography. Wein such circumstances you can use the 600 rule and be sure that you get your cake and eat it too. This rule uses the formula 600 ÷ focal lengths of lens = exposure time. So for example, if you are using a 35mm length your maximum exposure time would be 600 ÷ 35 = 17 seconds. So if you keep your exposure under 17 seconds you will avoid trails.
Levitation technique is a technique in which a mix of photography and software-based photo manipulation creates the effect of the food being suspended in mid-air. For this food is dropped from a height and using fast shutter speed captured by the camera. To create a better effect, this process may be repeated a number of times with different elements and then using software like Adobe Photoshop combined using various layers.
65. BEST ISO SETTINGSIn food photography, the ideal ISO settings would be 400 or less, and in case this is not possible, ensure that you do not go higher than 1600. Failure to follow this can introduce a lot of noise in your photograph.

Having a number of styling shoots on hand is essential in getting good output. Tools like cotton swabs, paper towels, gloves, and tweezers can be very helpful in carrying out food modification to suit your style.

Always keep a mist spray bottle handy, so that you can spray the fruits, vegetables, or salads before the assignment. This will keep them looking fresh and enhance the color perception.

When you work with drinks and have to create a great condensation effect on the glass, but the drops keep on drying or rolling down before the photograph is done....what do you do? Well, you can use a mix of water glycerin and spray it on the glass or the bottle, and now it will stay for a long time. Problem solved.
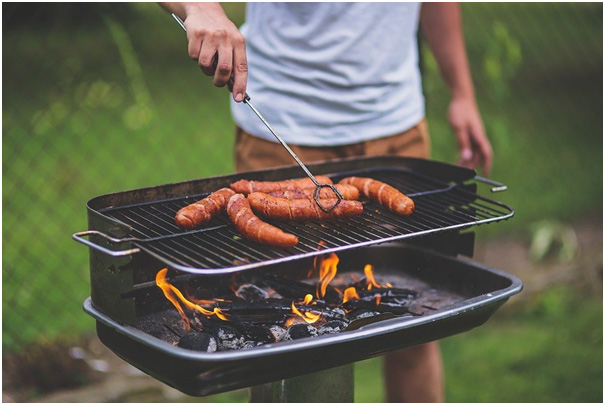
Grilling is an art. You can tell how well a steak was cooked by the grill marks on its surface, and if you want to take really good photos, make sure your grill lines have a perfect coat of eyeliner!
Mashed potatoes are the oldest tricks in food photography. Photographers and stylists use them for both roasted birds as well as desserts in order to make it easier to shoot pictures of their creations without having messy ingredients all over the place.
72. TO SHAVE OR NOT TO SHAVEShaving cream is another savior in food photos. The whipped cream will melt very fast under studio lights, so it will be a good option to replace it with shaving cream.
73. THE COFFEE TRICKYou saw that great bubbly coffee in the cafe ad, well think twice before drinking it. It just might have a bit of detergent added to give that foamy bubbly effect. Adding soap to the coffee creates better foam and bubbles than real coffee.
74. STEAM IT UPSteam is another essential ingredient of food photography. Who does not like seeing steam rising from hot food dishes? Well as far as photography is concerned, it is a bit difficult to keep the dishes running hot throughout, so we came up with a few tricks.
Photographers and food stylists use aroma sticks / agarbattis in order to get steam. Not only that, sometimes wet cotton balls heated in microwave ovens are used. They are added to the food and covered with food particles and they emit steam for quite some time.
And if you really like gadgets then you can use a steamer or vaporizers to add that steam to the shot.

Another way to keep fruits and vegetables fresh is by adding a tablespoon of ascorbic acid mixed with one cup of water. This mixture should be left on your product for about 15 minutes before being washed off. This will ensure that your food selection looks fresh throughout the duration of the shoot.
76. THE REFLECTION SOLVERThis is a lifesaver food photography tip. With a lot of shiny and glassy objects being a part of a food photoshoot, many times reflections become the bane of photographers. To overcome this matting spray is used. The matting spray is normally used for glass objects, silverware, ceramics, and metal in order to get rid of the glare and reflections.
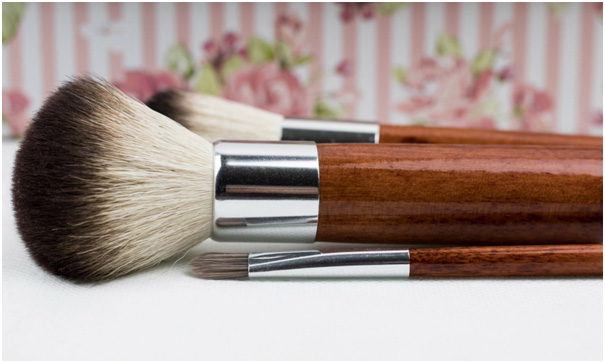
77. THE FAN BRUSHBesides using it on your face, the fan brush can also be considered an essential tool in the kitchen 🙂. The bristles are stiff and perfect for dusting away any crumbs left behind from cooking or baking before taking photos of anything tasty - even if it's right next to food!
You saw that great drink with ice cubes brimming on the top? Well sadly in food photography we use a lot of fake ice cubes as the real ones melt away quickly
79. BEST FOOD PHOTOGRAPHY PROPSTo get the best out of your food photographs, it is essential to make sure that you have the following props:
- Clean Linen
- Wooden and Ceramic Bowls and spoons
- Cutting boards
- Glass Jars and bowls
- Textured and plain backdrops in various colours
Another food photography tip for commercial food photography is that size matters. The perfect way to make your food look better is by photographing them on small plates. You'll also want to use salad-sized bowls and dishes, not regular dinnerware that dwarfs the dish's contents.
81. MULTIPLE LAYERSWhile photographing food try to use multiple layers in the composition. To do this on the lining lay a napkin, on the napkin place the plate, on the plate keep the bowl, on the bowl put food in layers, it could be ice cream with sauce and toppings and so on.
82. ADD IMPERFECTIONS TO THE PHOTOGRAPHSometimes going a little mad with the food styling could mean adding crumbs and food particles in a random manner. Please keep in mind that it looks natural and not messy.

Try to experiment while shooting and show partially eaten things (Just like the Mac Logo). But do not go overboard with this food photography technique.
84. CUT FRUITS OR SOLID FOOD ITEMS IN VARYING SIZES AND SHAPESWhen styling for a food photoshoot, try to cut fruits or any solid piece of food like cakes into unequal sizes. You can let go of the symmetry and try to experiment with different shapes and sizes.
Food will look more colorful and fresh if it is slightly undercooked. As the food will retain moisture and not look dry, hence it would appear beautiful in the images too.
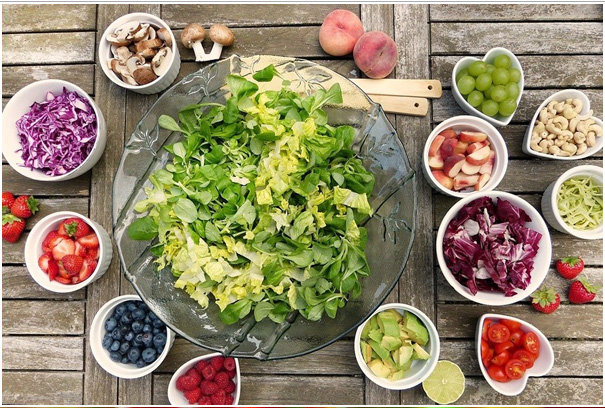
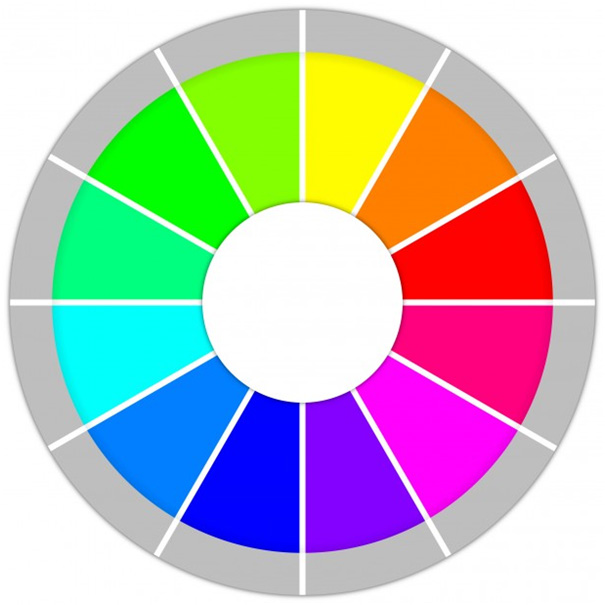
86. USE COLOUR THEORYLike any other kind of photography or graphics work, using colour theory can be of great use in food photography too.
The color theory or color wheel is one of the most important tools for artists. It helps to establish a logical structure and provides an easy way to organize colors by their relation on a circle. With this, we can easily arrange fruits or vegetables in order from primary hues (reds) all the way up through secondary ones (greens).
The beauty about these theories isn't just how it creates unity - they also offer different creative possibilities as well!
87. THE RULE OF ODDSA rule of odds states that if you want to take a photo with an interesting and visually pleasing composition, then use at least one odd number in the group rather than using two even numbers. For example, if you are shooting fruit, instead of shooting six fruit pieces just use five or seven. More about rule of odds
Chances are quite high that the image on your camera screen may look brighter than it would look on a computer screen. So while shooting food product photos, take care to take this into consideration.
89. SPOT METERINGModern DSLR and SLR cameras have multiple light metering modes that decide from which portion of the composition should the camera consider the aperture settings. For culinary photography, while shooting in manual mode, spot metering is a better option.
90. SHOOTING TIMEShooting time is especially very important when you are shooting outdoors. In an outdoor setting, it is always advisable to start either early in the morning or late in the evening.
91. DARK-COLOURED BACKGROUNDFor dark-colored eatables, a wooden background is preferable as the wood patterns bring out the hues and shades of the food in Photographs.
One of the best ways to improve your photography is by shooting in a controlled environment. Consistency ensures that you focus on the photography, rather than other things When you know what kind of photos you want, it becomes easier for you to plan the shots that will make them look amazing and professional on Instagram or Facebook- no one wants their guests making funny faces when they're trying to take an artsy family photo!
93. WHITE BALANCEAnother aspect of shooting any kind of image is getting the right color temperature. While a lot of people prefer using the auto mode for white balance, at times the auto mode can result in the color fidelity being lost. You can also use the manual white balance options and go beyond the predefined modes, to get creative with the color tone.
94. EXPOSURE COMPENSATIONAnother often overlooked feature is exposure compensation. This feature allows you to increase the brightness in the picture even at a high aperture.
95. STAND IN ICE CREAMOne of the challenges that you may face while shooting ice cream is its tendency to melt !! When you are setting up your composition and lighting, make sure to save keep the real ice cream in the refrigerator. And instead, use a stand-in ice cream. The stand-in should look like the original subject in design and shape
Adding human elements to the photography has many benefits. Photographer Arti Sharma from The Jigsaw , based in Mumbai, says that It makes the viewer feel more inclined towards eating a dish themselves, and it also helps with the storytelling aspects of photographing dishes. For ice cream photos, in particular, having an image that includes someone's hand holding onto their cone is very popular among photographers because it gives off the impression that they are able to eat this delicious treat as well - rather than just looking at pictures of other people enjoying them on social media or blogs!
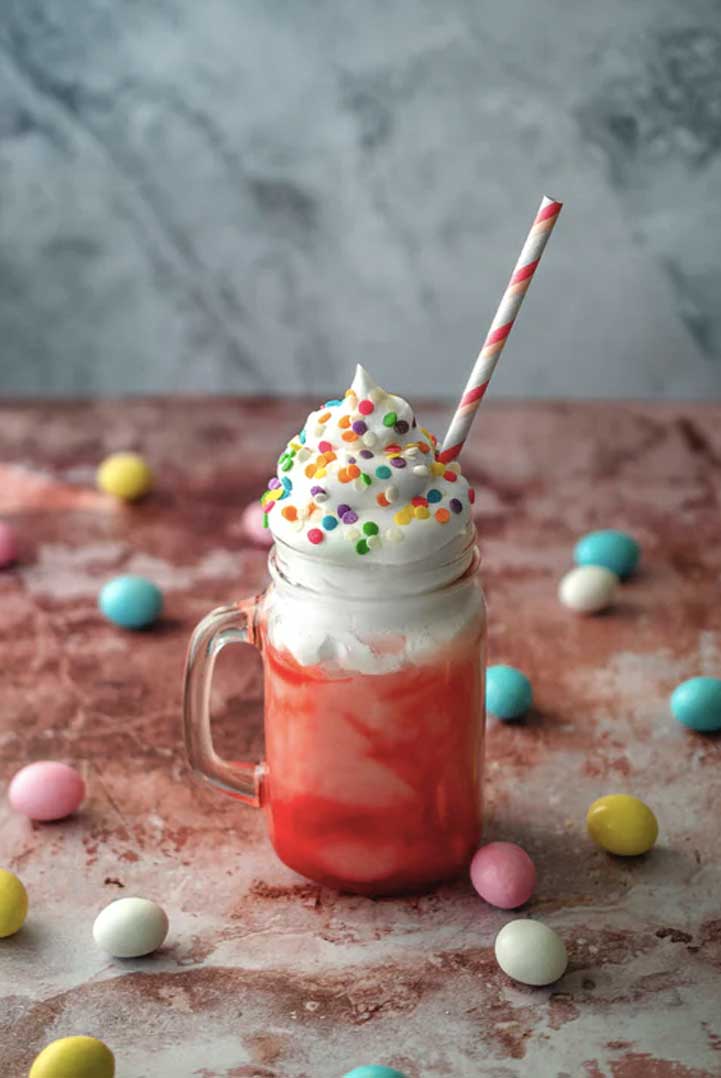
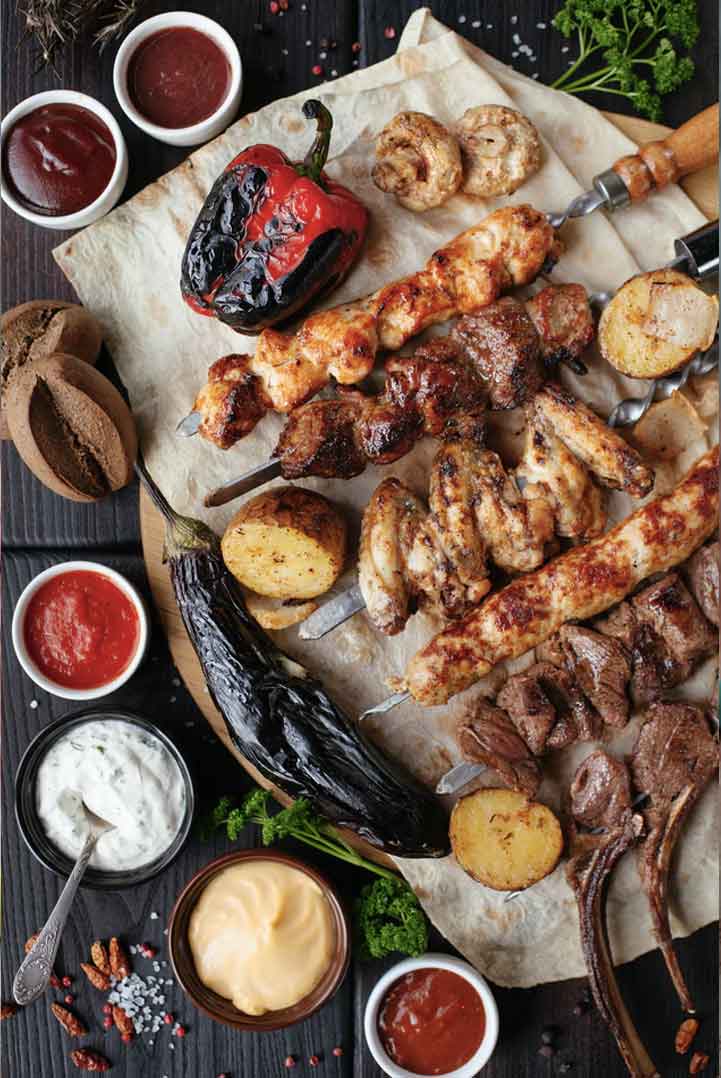
97. COLORFUL TOPPINGSFor eatables like ice creams, pizzas, smoothies, yogurt, and salads’ use of colourful toppings, a favorite for commercial food photographers. It adds to the vibrance of the photograph and makes it look more appetizing.
With knives, forks, and glass being the mainstay of a culinary photoshoot, getting rid of reflections can have you tearing your hair out. But worry not, you can control reflections to quite some extent by using polarizing filters and white cards.
99. USE OF REFLECTORSReflectors are often the unsung heroes in food photography. The reflectors offers more than just the advantages of producing a soft light without shadows. A professional photographer will be able to take advantage of other features such as bouncing, reflecting, and diffusing that would otherwise require multiple lights or an expensive equipment upgrade in order to achieve these similar effects with a flash unit alone.
Another important element of culinary photography is the direction of the lights. For food pictures, you can work with three types of lighting direction. You can work in food photography: side lighting, backlighting, and side backlighting. When you're taking photos of cakes, it's important to avoid frontal light. Sure, this method lights up your cake evenly and avoids shadows behind the subject. But we surely do not want our eatables looking flat with no life? Right!!
101. USE CAMERA TIMERA tip given by Photographer Ajit Rao, from Ecommerce Photography Mumbai , talks about Using a delay timer for avoiding blurry photos. He says that this has been a lifesaver for him on numerous occasions, as even a small shake of the camera from pressing the shutter button can give a blurred photo.
And chances are high that you may notice it on the computer. Such slight blurring is very difficult to see on the camera screen.
102. SPICE IT UPUsing various spices and contrasting them with the color of the background adds a visual flavor to the image.
Spice is a creative and rather inexpensive food photography idea. Put the spices of contrasting colors on the plates and experiment with the composition.
You position your product with the light hitting it from the back, then use a reflector to bounce the light back into the main site of the food item that you want to highlight. By doing this you will get nice soft light on food with a dramatic rim light on the edges of the dish.
104. USE BLACK REFLECTOR TO CREATE DRAMATIC SHADOWSPlaying with shadows is an important aspect of every kind of photography. Commercial photographer Ashish from Thane near Mumbai, India, says that in food commercial photography, we can use a black reflector to achieve the kind of shadows that enhance the scene.
105. USE A SOFTBOXUsing a soft box for photographing food helps in keeping out reflections and diffuses the light to give a soft glow to your food items.
106. TURN OFF ALL INTERNAL LIGHTSIIf you are shooting indoors, you can have a mix of lights of various color temperatures, this can skew the color of the food. So ensure that you switch off all other lights except the ones used during the shoot.
107. SPACE REQUIREDA good food photoshoot is likely to require adequate space for the lights, reflectors, and camera position. So before starting the shoot, ensure that you have the required space and floor clearance, or else getting the right angles and managing the reflections could become a task.
If possible, avoid shooting against a white background and or images with lots of whites. As the areas where the light intensity is low will end up looking grey.t intensity is low will end up looking grey.
109. USING COLORED LIGHTS OR GELSTo add some class to food pictures, use colored gels on your light source or use Wi-Fi multi-colored LED bulbs. This will enable you to achieve a lot of different looks within the same composition by just changing the light color.
If possible, avoid shooting against a white background and or images with lots of whites. As the areas where the light intensity is low will end up looking grey.
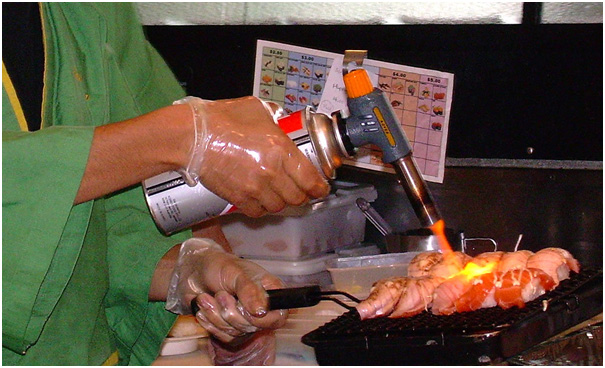
111. USE FIREIf you are planning to photograph food items that are hot and sizzling, then using fire as an element within the composition livens up the entire photograph..
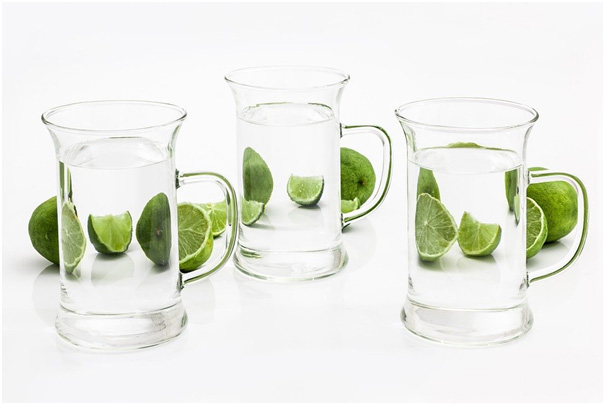
112. USE REFRACTION PROPERTIES OF WATERWhile shooting clear liquids like water or Vodka, you can use the refraction power of the drink in the glass to make a creative and interesting composition, like the one below.
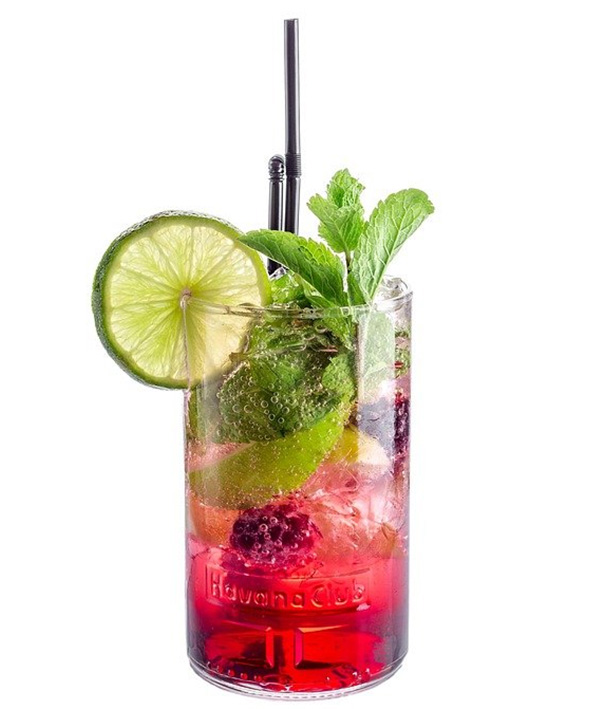
113. USE INGREDIENTSLike food photography, while shooting drinks, including the ingredients of the drink in the photograph along with the drink will liven up the photography quite a bit.
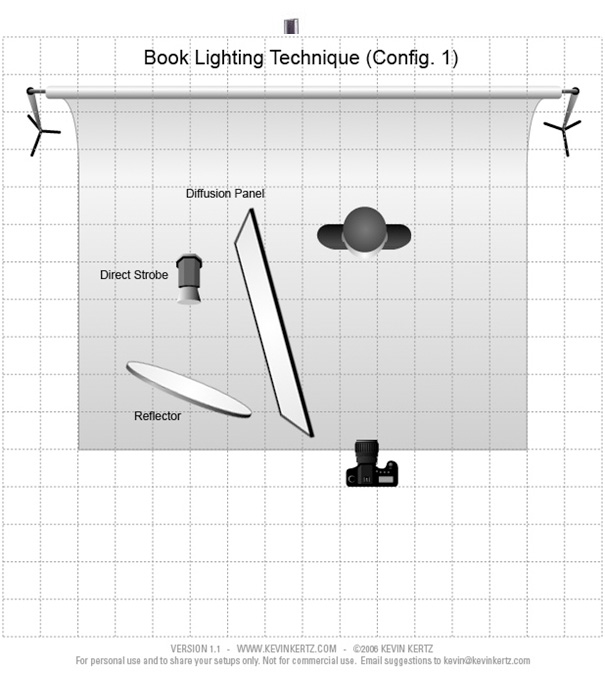
According to Commercial photographer Makrand Joshi from Parel in Mumbai, book lighting technique is a great asset in a food photographer's arsenal. In food photography, the use of chrome and glass creates a lot of reflections, and using this technique the light is double diffused. The light is simply a bounced source of light that is diffused with another layer of diffusion. The light is positioned 45 degrees to the reflector, and diffusion layer. This reduces the reflection on glass and chrome objects to a great extent.
115. ONE LIGHT SHOOT TIPIf you are using just one light to shoot a food item, then it is advisable to also use a reflector in place of fill light. Shooting without the reflector will cause hard shadows and ruin your photograph.
The crockery and cooking utensils in food photography are integral to the image. But deciding where to put them can be a challenge. One simple tip is keeping all handles towards the viewer, making him or her an important part of your photo shoot. This will make it more appealing for you customer who wants their experience replicated at home--just like they imagine! Eight Hacks for Utensils in Food Photography
117. MICROFIBRE CLOTHESMicrofiber cloths are of great help in professional food photography. They help in the removal of dust, smudges and fingerprints in such a way that no fibers or residues are left. So, if you use it, you shouldn’t worry about small particles that may appear in the final photo.
You may have seen that sumptuous-looking hamburger filled with the goodness of cheese, burger, tomato, and lettuce. But when you buy it, it actually looks much thinner. Well, the secret of the fat hamburger is the layers of cardboard filled between the ingredients to make it look oversized. https://www.youtube.com/watch?v=MflT0I7ZPCs
119. ADD FOOD FIRSTWhen you start the process of food photography, always start with placing the food in the composition at the very start. This will give you a better idea of the props and colors to use in the photograph.
120. IT'S BETTER TO BE DULLMake it all dull!!! Glossy plates and bowls may be pretty but they can make food photography difficult, so go for a matt finish.
Hope you have enjoyed our tips and they help you in your endeavor to shot great food photographs.
Go ahead and experiment, hopefully, these tips will come in handy in getting that perfect shot.
Bon appétit!
Overcoming Challenges in Food Photography
Preserving Authenticity:
Problem : One of the major problems that I have faced in photographing food is that sometimes food actually does not look good and the client insists on taking the photograph the way it is to preserve authenticity of the food. And when we complete the assignment the client realizes that what we had said earlier was correct. So this is a facepalm moment. One of the biggest problems I've faced in food photography is when the food just doesn't look good, but the client insists on taking a photo of it "as is" to preserve authenticity. Then, after we finish the shoot, the client realizes that we were right all along. It's a real facepalm moment.
Solution : Now to get over this and to persuade the client we carry images of photoshoots where we have not stylised it and show it to the client as a reference of what the output is likely to come like if we keep the food looking as it is. This ensures that the client understands the need to style it and does not insist on photographing as it is.
To convince clients that styling is necessary, we show them photos of unstyled food shoots. This helps them understand what the results will be if we don't style the food, and they're usually more willing to go with our plan after seeing that.
Frozen Food Issue :
Problem :Whenever we photograph frozen food and if the food item is very cold then condensation forms on the surface and the food items look very dull.
Solution : Wiping the food item and package after every shot. You can also use a soapy wipe to do this as it ensures that the moisture does not form quickly.
Time Management :
Problem: Food photography often requires working quickly before the food loses its appeal.
Solution: Plan your shots in advance and have all equipment ready. Work efficiently to capture the best images while the food is at its freshest.
Food Freshness and Appearance :
Problem: Food can quickly lose its freshness, affecting its appearance during a prolonged photoshoot.
Solution: Prepare backup dishes or elements of the dish to swap in as needed. Use techniques like spritzing water to keep vegetables looking fresh and applying oil to meats for a juicy appearance.
Pricing Challenges in Food Photography
Problem: Determining the Right Price for Services
One of the trickier aspects for food photographers is deciding how to price their services. This challenge can create uncertainty not only for the photographers but also for their clients.
Solution: