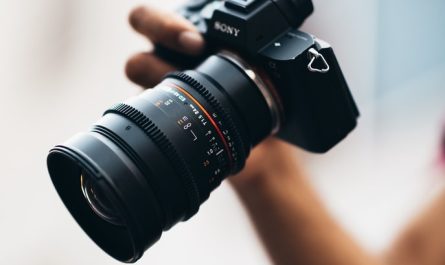
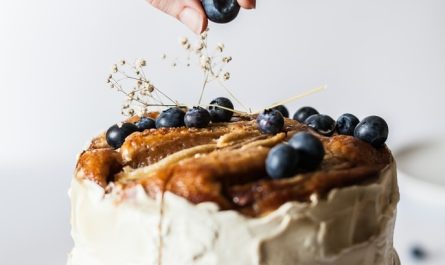
Food is near and dear to ones’ heart, and when you cannot resist clicking food photographs, it is the time when you realize your interest in food photography. When you are a beginner in food photography, you may wish to have some tips and hacks to start with or improve your food photography.
Congrats! You are in the right place.
Here we have curated some of the essential Food photography tips for beginners. So, without any delay, let us explore the tips.

Food Photography Tips For Beginners
1. Prepare the Food and its utensils
It is necessary to ensure that the food is ready to be photographed. It will look monotonous and unappealing unless the dish is tastefully garnished and emphasized with the Flash. Apart from the primary food, ensure sure there is no mess or dirt beside it.
- Clear the cutter– Feel free to remove anything that you find odd or not required in the frame. Keep the set-up appealing yet straightforward.
- Do not touch the food with bare hands- Touching the Food with a bare hand can make the food-stained at undesirable points.
- Clean the utensils- Make sure the accessories or the utensils are dirt free. If the steel or glass utensils reflect too much, then just put some powder using a brush. Remember not to use fingertips as they will leave fingerprints on the utensils, clearly visible in the food photography.
- Do not mess up with the background or the setup- Keep the background simple. Keeping the background busy will draw the attention of the viewers away from the main Food.
2. Make friendship with natural lights.

When you are a beginner, you must learn to trust natural lights. Firstly, you do not have to go and know about the technical lighting stuff when you have just started with food photography. Secondly, you will not have to spend tons of amount on lights and lighting accessories.
- Find the Windows– Choose the corner which is getting the most natural light.
- Use reflectors– If you need lights towards the source of natural light, you can use reflectors. Reflectors can manipulate the light source to bounce back onto the Food. This would remove dark shadows and brighten up the Food to be photographed.
A more straightforward solution is to use the white card or a white foam board, which I easily available at the roadside stationery shop.
Similarly, a black card or a black foam board can take away lights and create shadows.
- Diffuse when needed-
When the sun is too bright, and you do not want harsh light food photography, it is the time when you would be requiring diffusing the lighting.
A diffuser can soften the light, making it less direct and harsh if too much light is flowing in or in the middle of the day.
Diffusers come in various styles, but you do not need to buy diffusers as you can use what you have- drape a semi-transparent white curtain over your window, or attach parchment paper to your window or use a thin white bed sheet or dish towel.

- Play with the shadow- The section of the dish that is hidden by the shadow is graphically appealing. Because a flat photo with the same lighting is less attractive, shadow plays a significant part in food photography.
3. Take care of the fundamentals.
Aperture, Shutter speed and ISO are the three parameters that determine exposure. Exposure is defined as the amount of light that enters your camera’s sensor and determines how light or dark your photo will seem. So, by definition, we can understand how important it is for all types of photography, including food Photography.
- Aperture- Aperture, which is stated in f-stop numbers such as f/8 or f/2.8, is essentially a hole through which light travels that is your lens.
- Shutter Speed-
Your camera’s shutter speed refers to how long the shutter remains open while you take a picture. If your shutter speed is 1/100, your shutter will be open for only 1/100th of a second when you take a picture. Unless you use a tripod, the lower the shutter speed, you will get more motion blur.
When shooting Food with a tripod, you do not need a fast shutter speed because most shots are static. However, if you want to freeze the activity of dusting powdered sugar on a cake or pouring syrup over pancakes, you will need a faster shutter speed. Experiment with the numbers, but for these types of action images, it is recommended to use a shutter speed of at least 1/125 second or more significant.
- ISO-
The sensitivity of your camera’s sensor to light is referred to as ISO. This means that if you are shooting in a bright environment, your camera does not need to be highly sensitive to light, and a low ISO, for example100 or 200, will be enough. If you are shooting in low light, your camera will need to be extremely sensitive to light, and you may need to use a high ISO setting, for example, 1600.
The higher the ISO, the more “noise” your images will have, giving them a grainy appearance. While this may appear artistic and desired, it is recommended to stick to a low ISO as much as possible for most beginners. You can get rid of the graininess with an expensive camera and decent editing, but that is not recommended for beginners.
So now you are handy with some of the best food photography tips for beginners.
If you want to learn more about food photography tips, food photography hacks or how to avoid the common mistakes in food photography, then visit the blog section in Best Food Photography Services Mumbai (foodphotographymumbai.com).
Also, there is some excellent content on the Food Photography portfolio, food photography website and food photography tear sheets.
Feel free to contact us for more queries.
All the Best!


